Gallery Tutorial : from creating an event to sharing the QR code
This tutorial walks you through your 256SOF space, step by step, to set up a complete event: creating the event, adding three galleries, customizing them, then uploading your photos and sharing the QR code through WebLight.
Set aside about ten minutes for the setup. Nothing to install, everything happens in your browser.
Workflow overview
Before the details, here is the path we will follow. Every step takes place in your space, except the upload itself, which runs in WebLight.
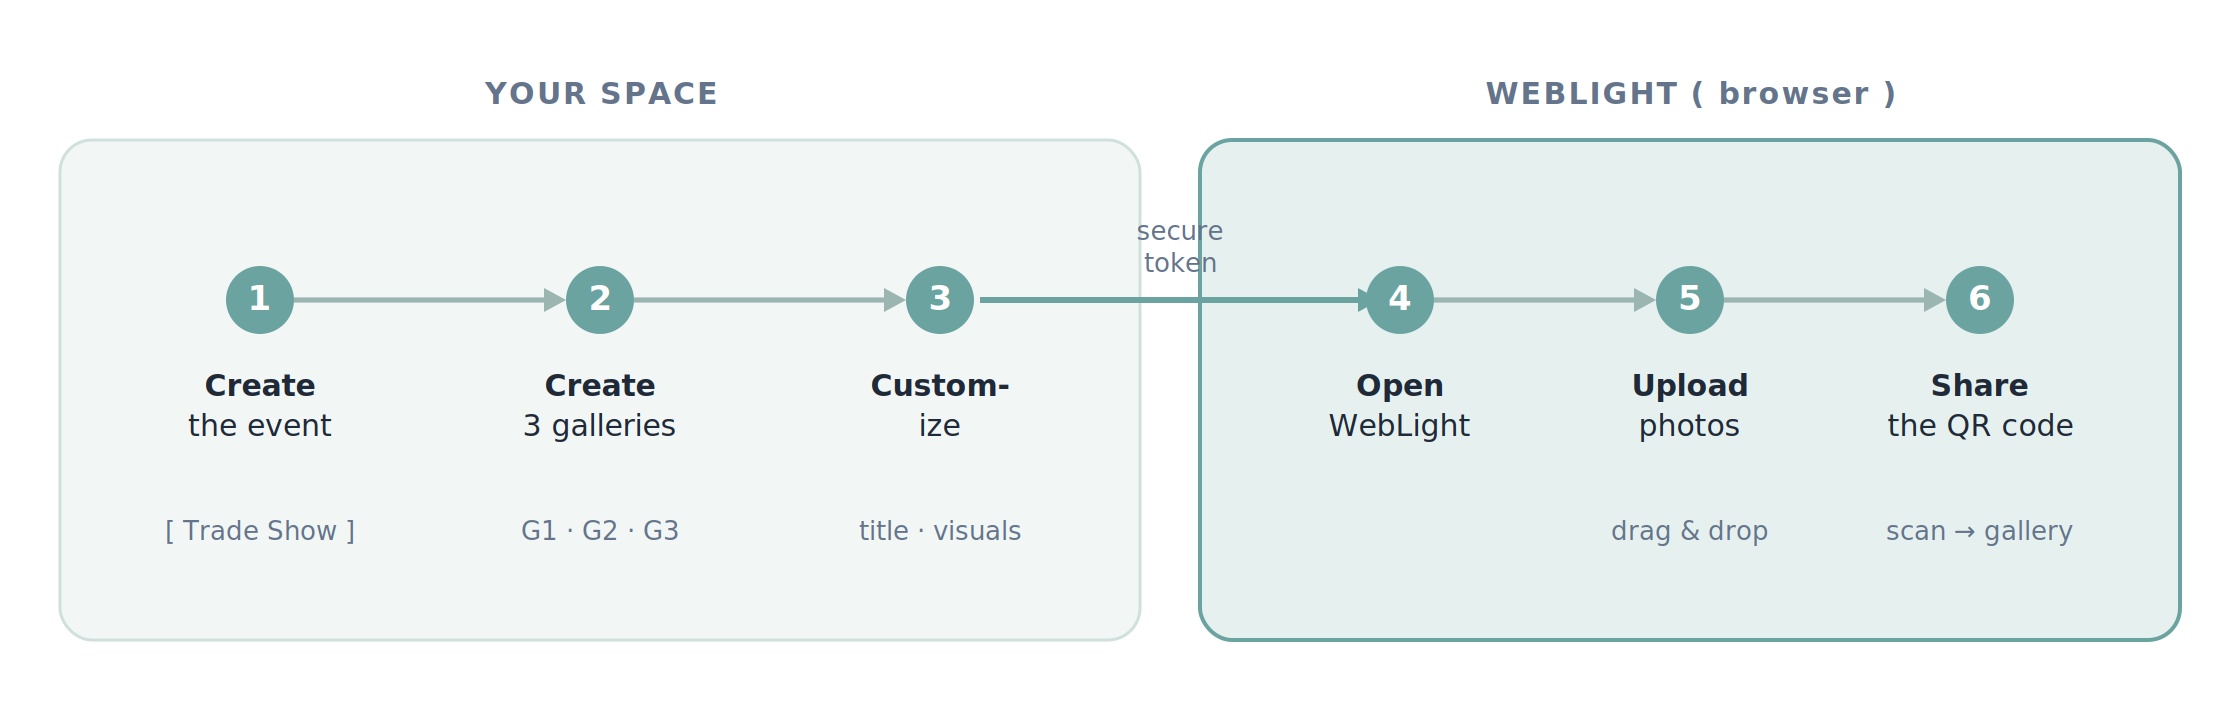
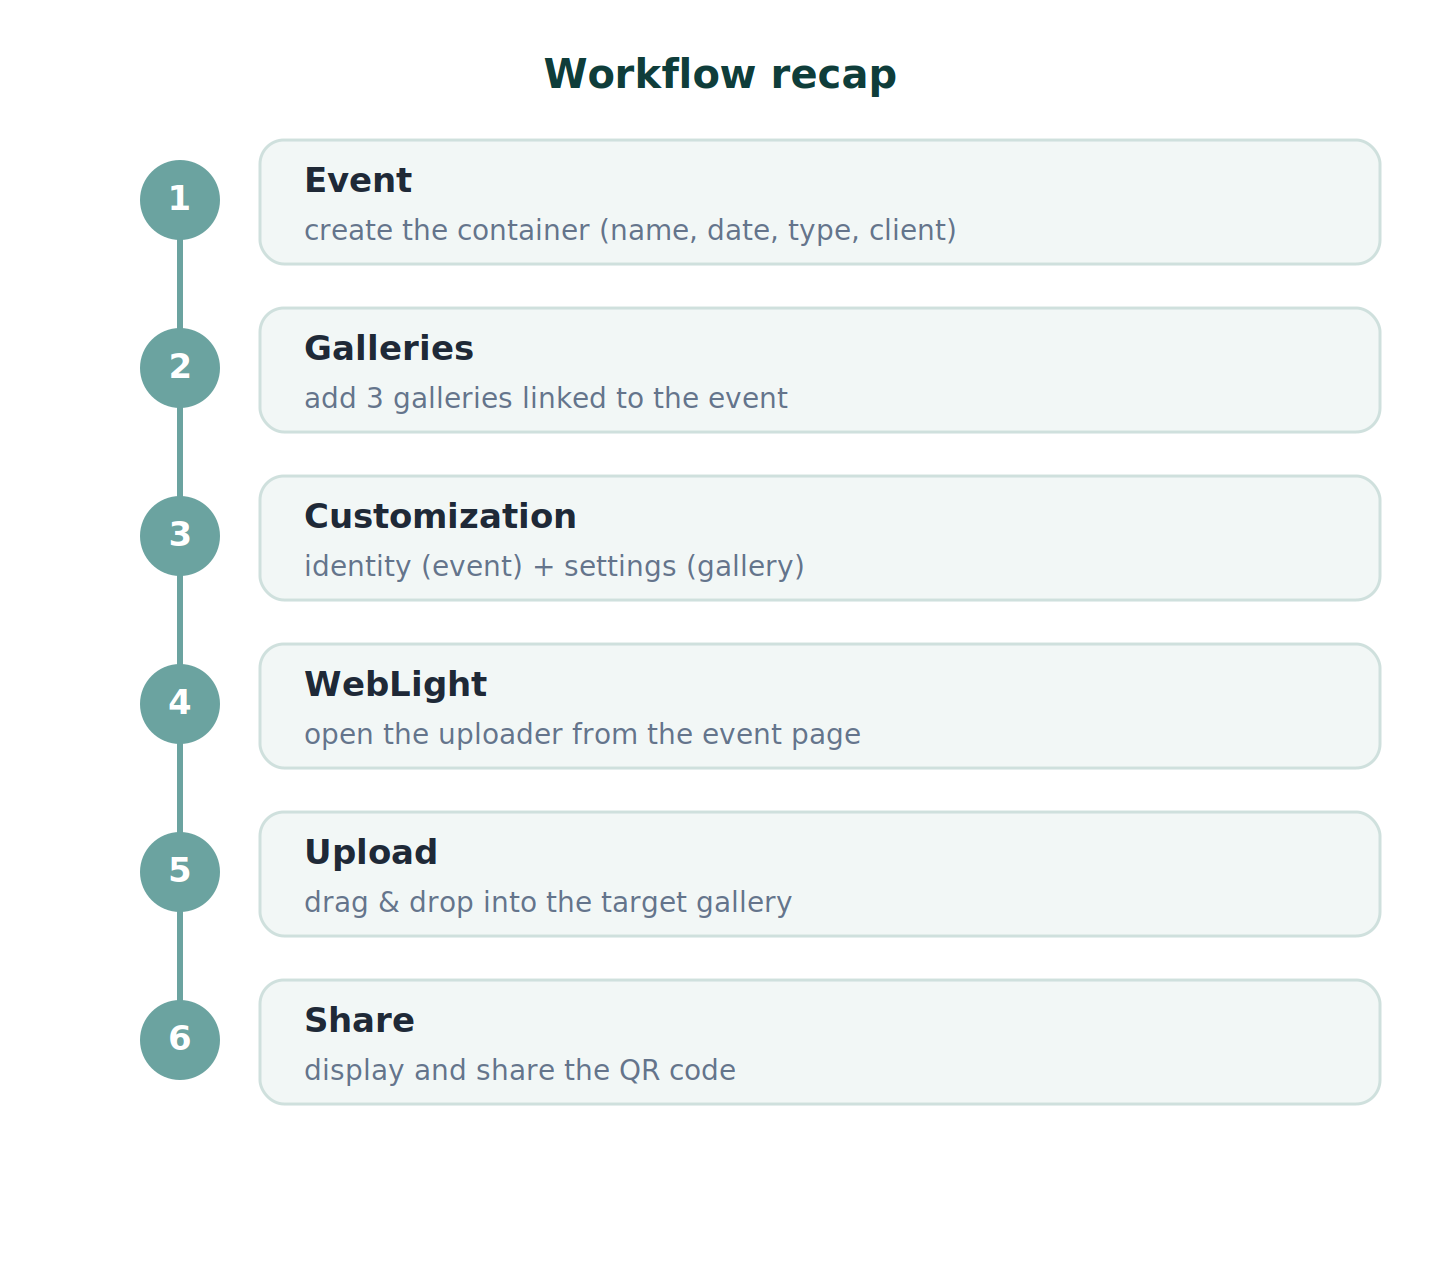
An event is the container. It groups several galleries together (a booth, a stage, an evening, and so on). Each gallery has its own public page and its own QR code.
Step 1. Create the event
Open the Events menu, then click New event.
Fill in the basics:
- Event name: the internal name that helps you find it later, for example “Trade Show 2026”.
- Date: the date of the event.
- Type: choose PhotoCall for standard distribution with public galleries and QR codes. The Proofing type is reserved for client photo selection, with quota and deadline.
- Client: link the event to a client in your address book (optional, but handy for aggregated statistics).
Save. The event is created and appears in your list. You land on its page, which you will return to in step 4, so keep it open.
A short event code is generated automatically at creation. It is permanent and serves as the basis for the public addresses. There is nothing else to do about it.
Step 2. Create the three galleries
From the event page or the Galleries menu, click New gallery. The link from the event page pre-fills the parent event for you, which avoids any mix-up.
For each gallery, fill in:
- Gallery title: for example “Booth A”.
- Event: this field is required. If you came from the event page, it is already selected. Just confirm it points to the right event.
- Status: Draft while you prepare, Published once the gallery should be public.
Save, then repeat twice to end up with three galleries. They are numbered automatically in creation order, inside the event.
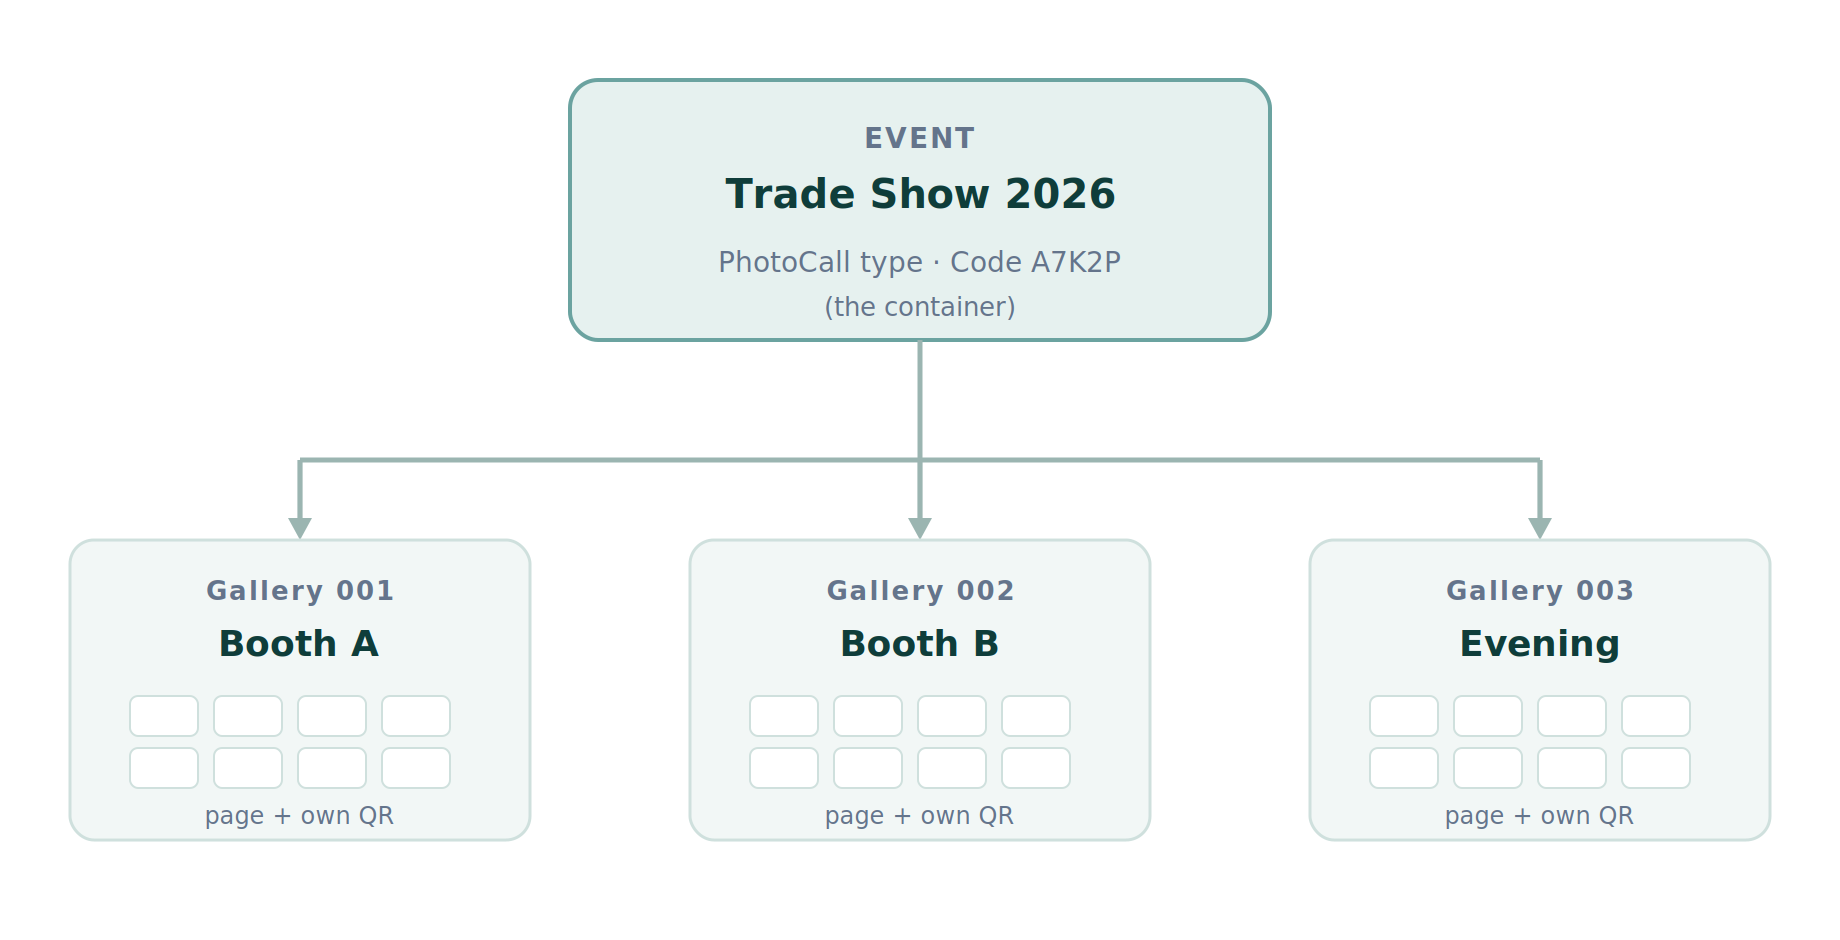
Each gallery stands on its own: its own page, its own QR code, its own statistics. Photos from one gallery never mix with those of another.
Step 3. Customize a gallery
Customization works at two complementary levels. Understanding this logic saves you time.
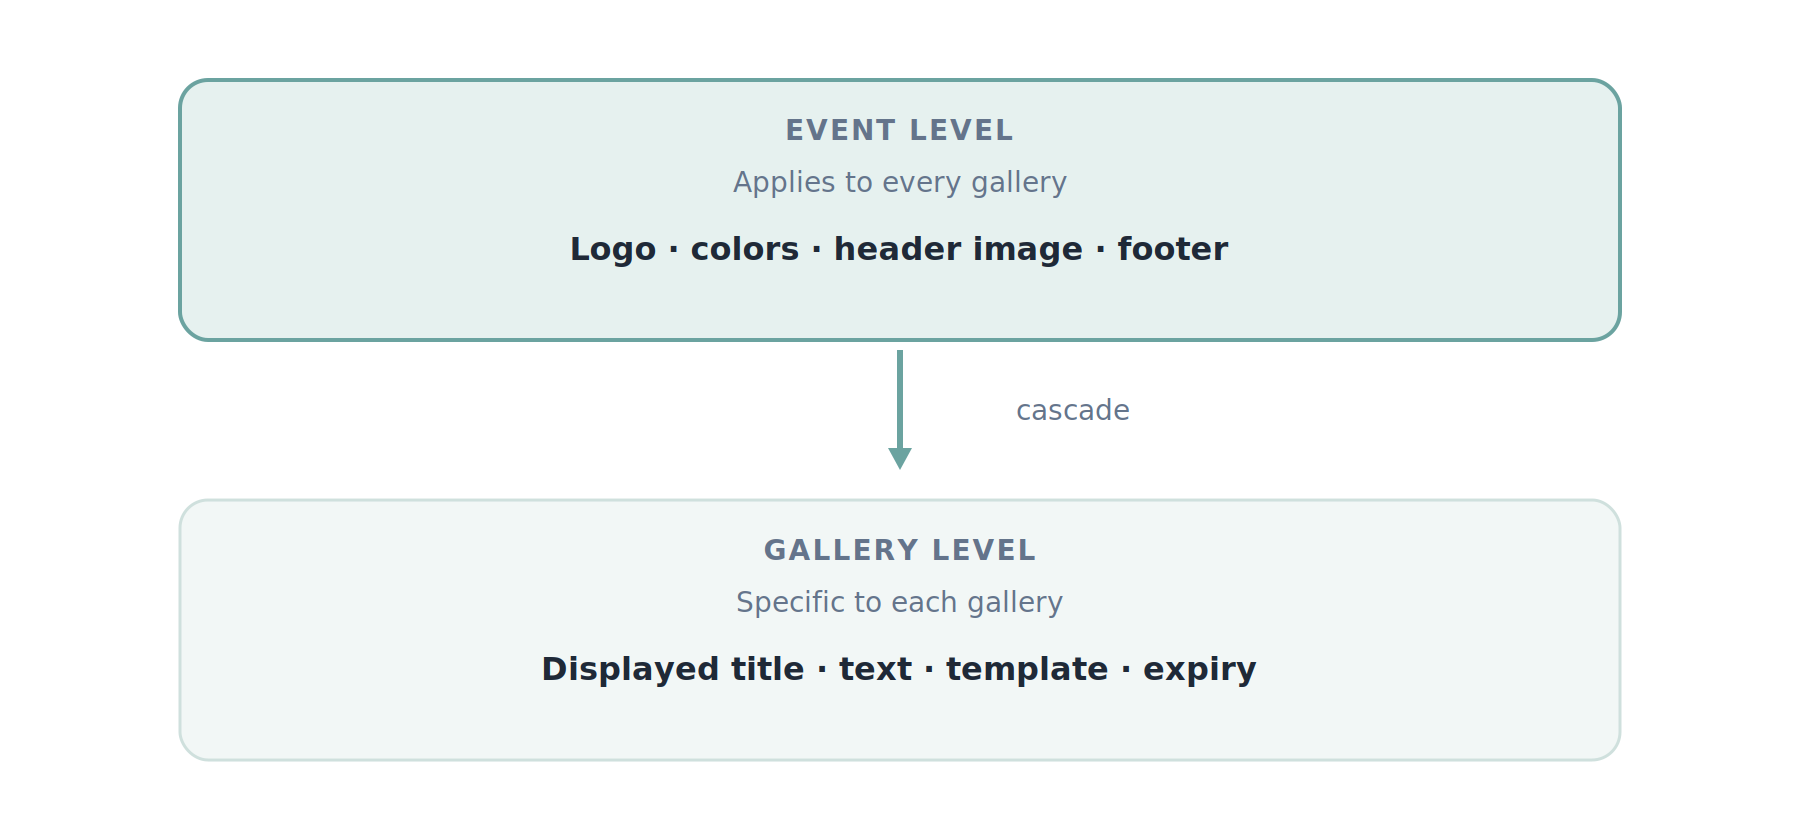
Visual identity (at the event level)
Visual identity is set once and applies to every gallery in the event. Open the Customizations menu, create a customization, then link it to your event from the event page.
There you define:
- The header: a solid color or a background image.
- The logo shown on the page.
- The background color of the gallery and the footer.
- An introduction text for the event.
A single customization can dress up several events, so you reuse your visual identity from one event to the next.
Gallery-specific settings
Open a gallery for editing. In the Gallery page display card, you can override, for this gallery only:
- Displayed title: the title seen by the public, distinct from the internal title.
- Description text: a short welcome message.
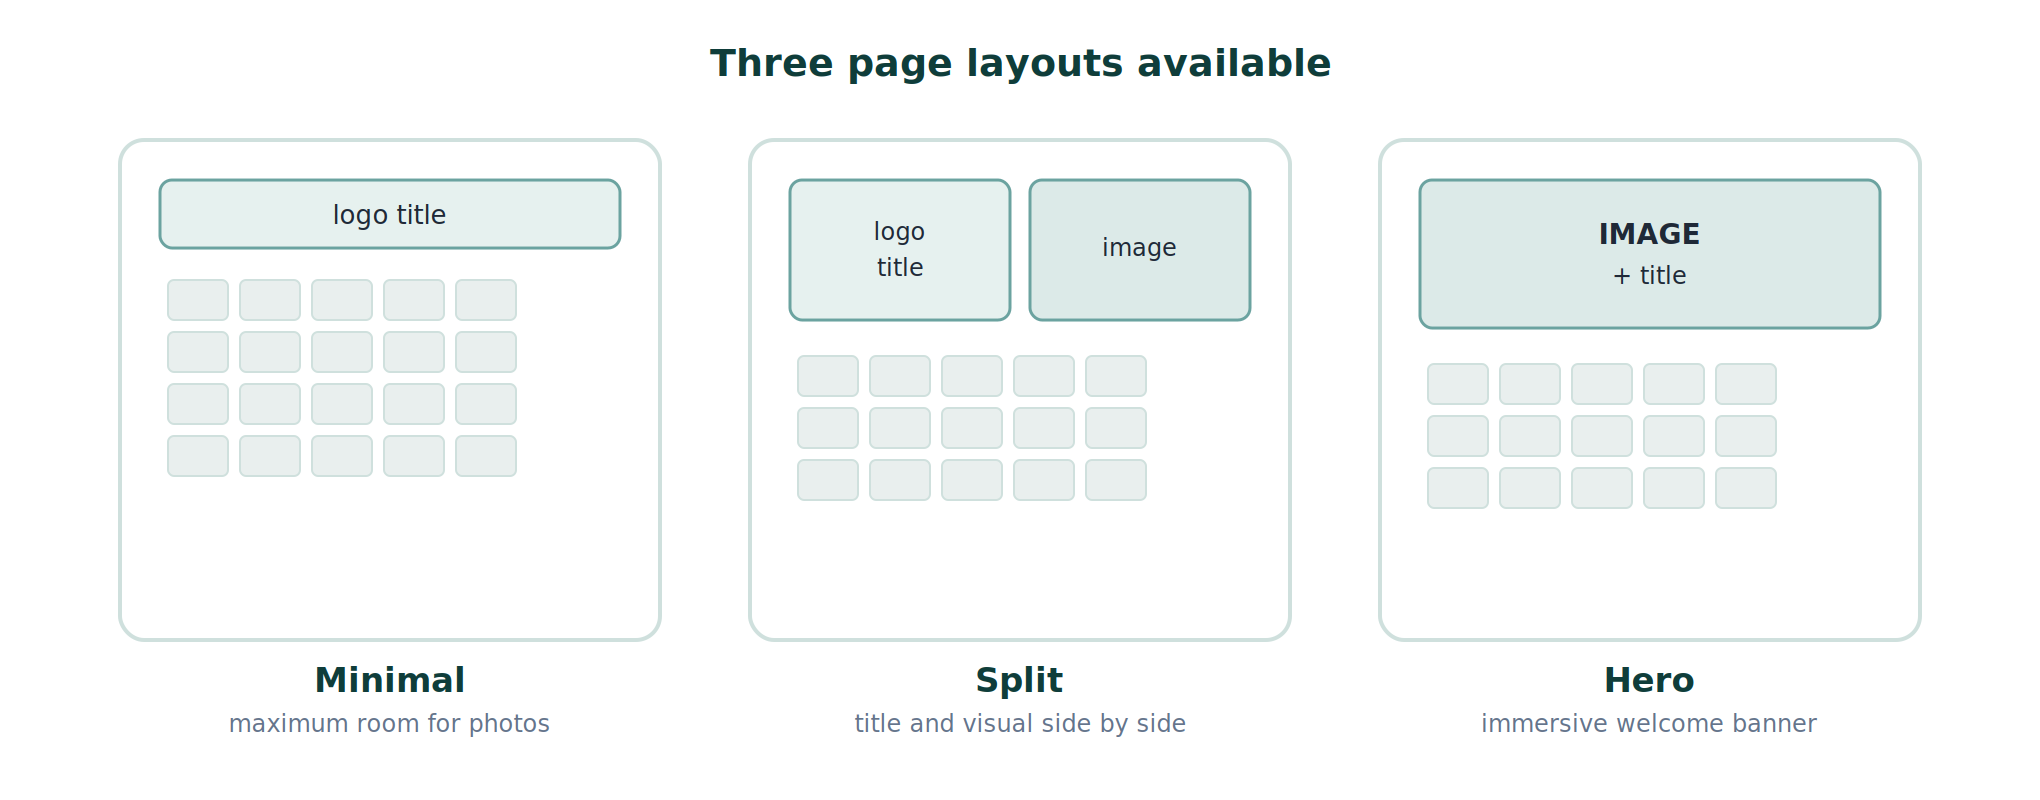
- Template: the layout of the public page. Three arrangements are available.
The same card also lets you set an expiry date, after which the gallery is no longer accessible. Useful to frame how long the gallery stays available.
Save your settings. The gallery is ready to receive photos.
Step 4. Open WebLight
WebLight is the upload interface. You do not sign in with a password: access runs through a secure token generated from your space, valid for the current event.
Go back to your event page. In the dedicated section, click the WebLight button. A token is generated and WebLight opens, already linked to your event and its galleries.
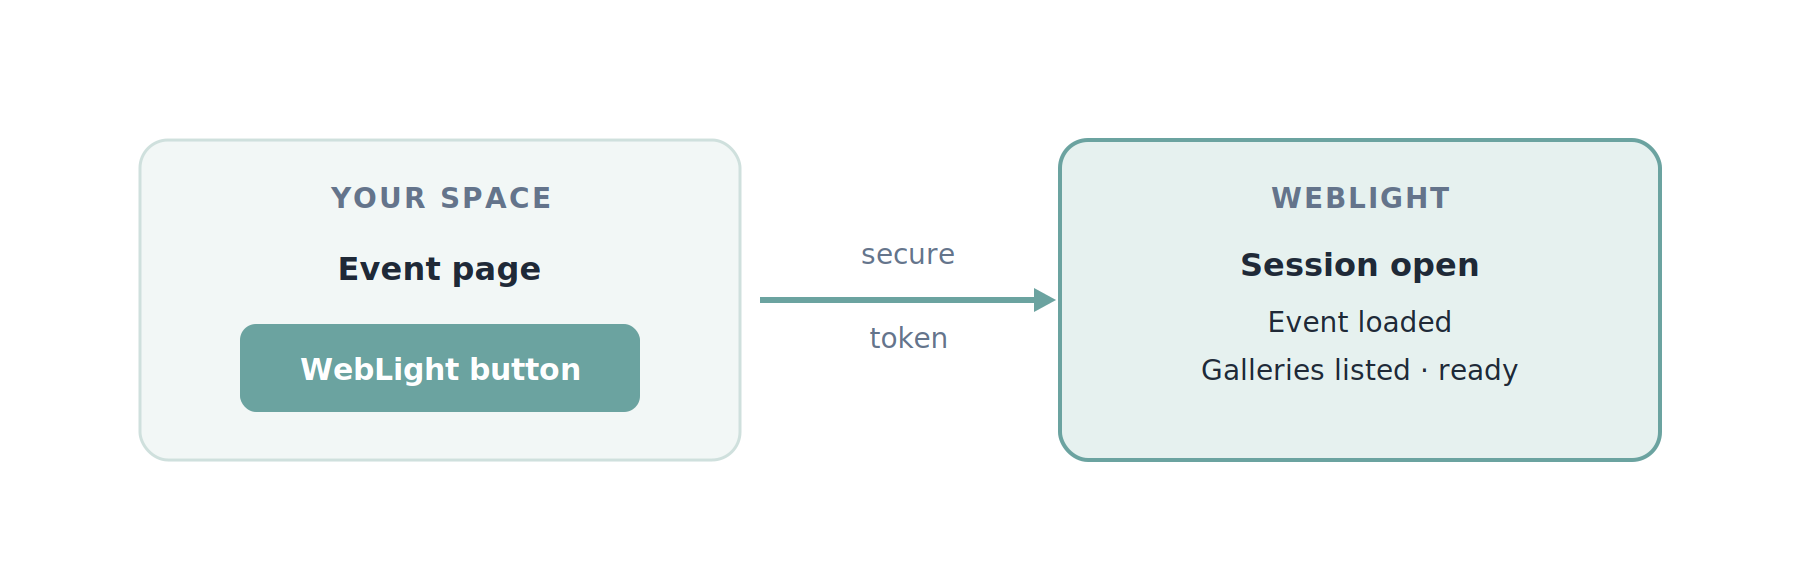
The token carries no secret and has a short lifespan. If the WebLight page stays open for a while, the session keeps itself alive as long as you are working. If needed, simply reopen WebLight from the event page to start from a fresh token.
Step 5. Upload the photos
WebLight is organized around a side menu. The main views are Upload, Manage (photo management), Stats, Slideshow, QR / Share and Settings.
Pick the target gallery
At the top of the interface, the gallery selector lists your three galleries in order. Select the one you want to send photos to, for example “Booth A”.
Drag and drop
In the Upload view, drag your files into the drop zone, or click to choose them. You can also capture straight from a smartphone camera.
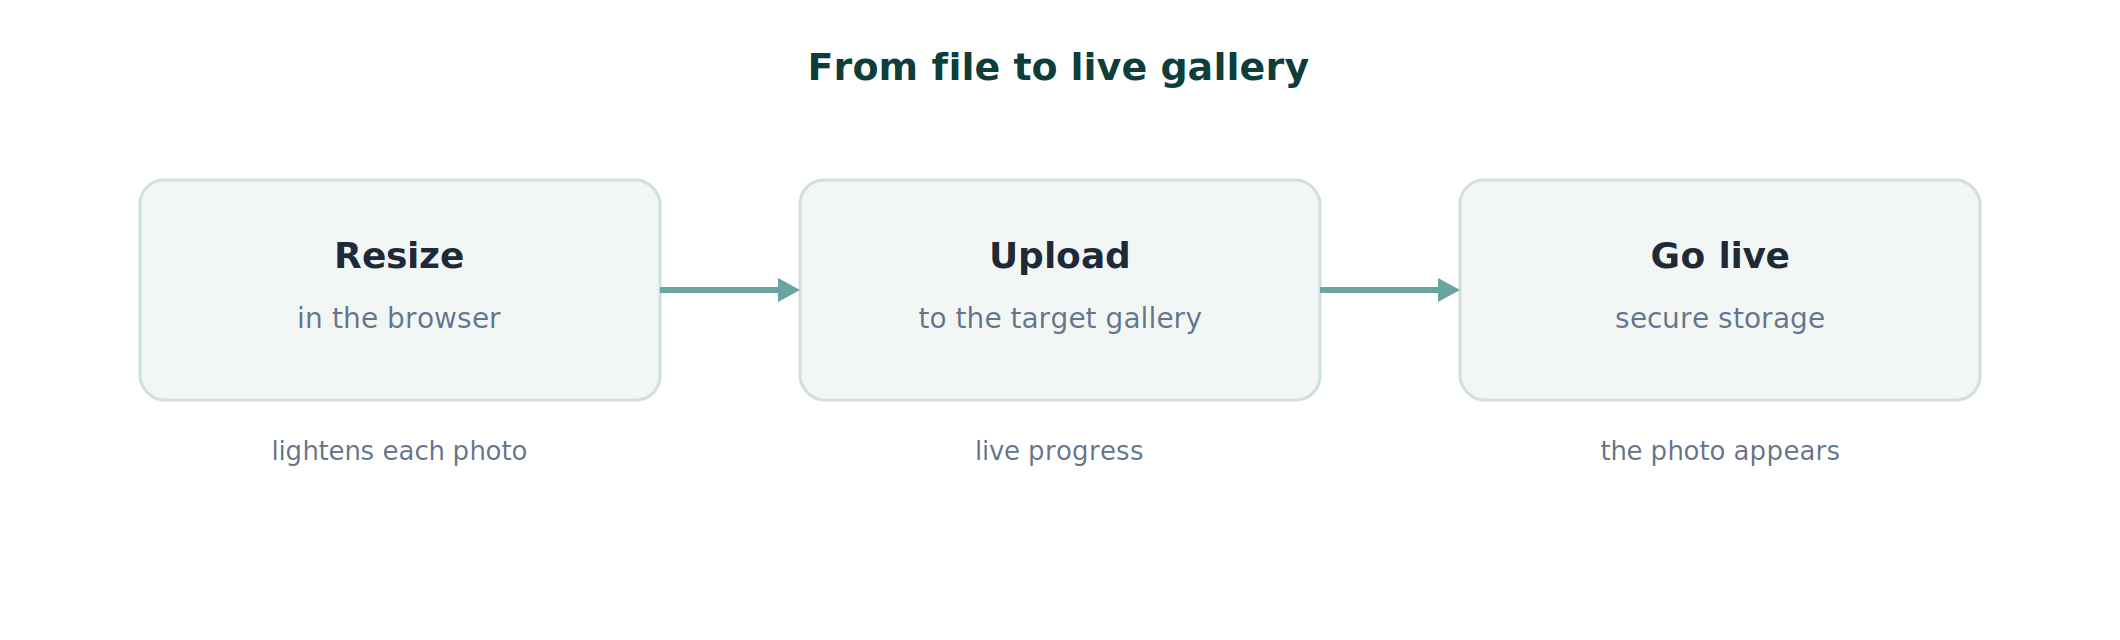
Photos are prepared in your browser, then sent to the chosen gallery. Progress shows file by file. You can keep dropping photos while the previous ones are still uploading.
To fill another gallery, just switch the target in the selector and start again. Your uploads in progress are not interrupted.
Check and organize
The Manage view shows the gallery photo grid. There you can hide a photo, delete it, or move it to another gallery in the event. Handy for a quick sort between two series.
Step 6. Share the QR code
This is the step that connects your photos to the public. Open the QR / Share view in WebLight, after selecting the gallery you want.
You will find:
- The QR code for the gallery, generated on the fly.
- The link to the public page, copied in one click.
- Direct sharing on mobile and a QR image download, ready to print.

Each gallery has its own QR code. For an event with three galleries, you share three distinct QR codes: one per booth, stage or zone. The visitor scans the one that concerns them and goes straight to the matching photos.
A gallery’s public address always follows the same form: 256sof.com/qr/{client}/{gallery}.
No personal information is asked of the visitor to view or download their photos. Viewing stays anonymous by design.
Recap
Your event is live. Visitors scan the QR code and reach their photos in seconds, with no sign-up. You track activity from your statistics, gallery by gallery.
Frequently asked questions
Do visitors need to create an account to see their photos?
No. The visitor scans the QR code and lands straight on the gallery. No sign-up, no email address, no password are required to view or download photos. Viewing stays anonymous by design, one of the principles at the heart of the platform.
Can I upload from my smartphone during the event?
Yes. WebLight runs in the phone browser just as it does on a computer. You can drag and drop files already on the device, or capture a photo directly with the smartphone camera and send it to the selected gallery. Handy for sharing live from the floor.
How many galleries can I create in an event?
You create as many galleries as your plan allows. Each one is linked to the event and numbered automatically in creation order. The workflow imposes no limit: three galleries serve as an example here, and you are free to add more for your zones, booths or moments to cover.
If I add photos later, does the QR code change?
No. A gallery’s QR code and public link stay stable throughout the life of the event. You can print and share the QR right from the start, then keep uploading: new photos appear in the gallery you already shared, with nothing to regenerate or re-share.
What happens at a gallery’s expiry date?
Once the expiry date is reached, the gallery is no longer accessible to the public through its link or QR code. It is an optional setting you define per gallery, in the “Gallery page display” card, to frame how long the gallery stays available. As long as no date is set, the gallery remains accessible.